27 março, 2010

Coelhinhos em Tecido

2ladus
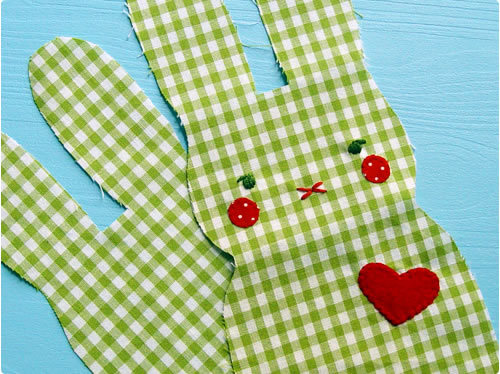
molde para criar um simples coelhos.Aqui foi usado esse milde,mas com algumas modificações. A versão simples é realmente muito fácil - absolutamente perfeito para iniciantes.. E a outra versão é só um pouquinho mais e complicada - mas não é difícil.
A Páscoa já está próxima,então é bom se apressar

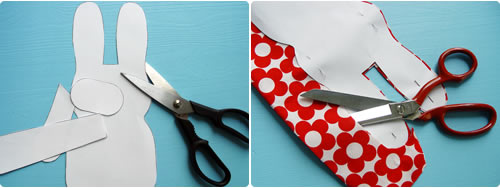
Primeiro baixe >>> RevoluzZzionary Easter Bunny pattern e imprimi-lo .
easter_ladu02
--
coelho simples:

easter_ladu03

easter_bunny04fh11


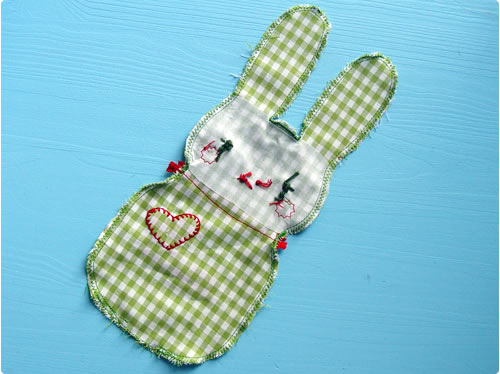
easter_bunny05fh11

easter_bunny06
coloque enchimento no seu coelhinho.
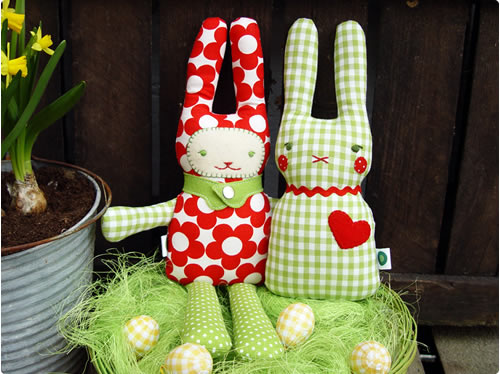
Este coelhinho bonitinho é perfeito para a decoração de Páscoa -, mas também é perfeito como um brinquedo para bebês. It's perfect for little hands to grab it. E isso fica ainda mais emocionante para os bebês quando você coloca um guizo na barriga do coelho.

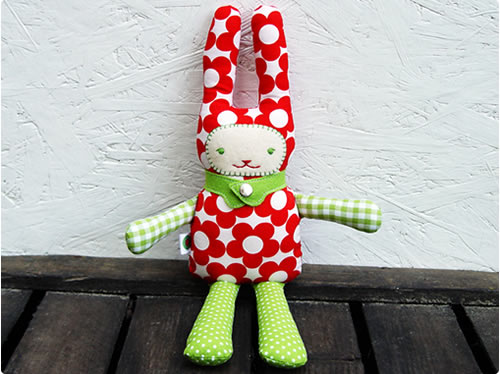
Agora, tente outra versão.

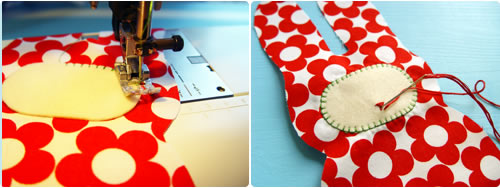
Use o mesmo molde de antes para o corpo e corte os braços e as pernasPode cortar a carinha também.
Costurar o rosto no coelhinho -se sua máquina não tem esse ponto quilt especial você pode também usar um ponto zig zag ou o que quiser. Em seguida, borde o rosto do jeito que você quiser.
easter_ladu06
easter_bunny07
Alfinetar braços e pernas , costurar-los as duas parte juntas(deixar espaço para colocar o enchimento).Colocar o enchimento.
easter_bunny08
easter_bunny09
Então marcar com uma caneta os pontos onde vai ficar os braços e pernas.
easter_bunny10
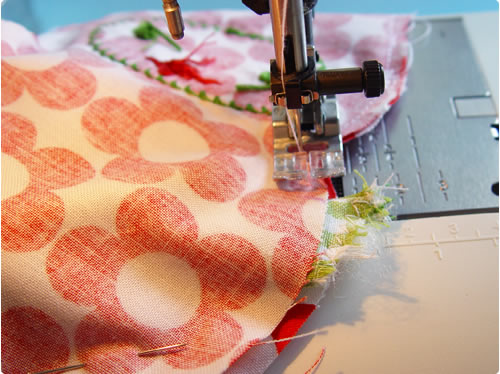
alfinetar frente e trás do corpo em conjunto, insira o primeiro braço e - início de costura. Insirir o outro braço pouco antes de eu chegar ao ponto que você marcou.
easter_bunny11
easter_bunny12
O mesmo com as pernas. Então corte as partes entre as orelhas e costurar as bordas do corpo do coelho com um ponto zig zag.
easter_bunny13
desvire.
easter_ladu14
colocar o enchimento

easterladu_small

easterladu03_small

Retirado daqui

20 março, 2010

Postal da Páscoa

Postal da Páscoa


This is the card I made.

Fcdcmeggcard

I thought it would make another good Easter project, so here we go...

Materials: Urban Lily Secret Keeper Cards, pattern paper (I've used new Paper Salon KN Easter Sorbet paper), cardstock, embellishments (felt ribbon, buttons, flowers, brads, etc) and greetings stamp for the inside of the card (I've used some new Paper Salon Easter stamps which I've just received).

Just case you haven't seen them, this is what an Urban Lily Secret Keeper card looks like when it's open. They are very versatile, but I find they make fun interactive cards.

Fceggcard1

1. Cut an oval/egg shape from pattern paper. Make sure it will cover the UL Secret Keeper card if you are using one, or that it covers whatever base card you will be putting this on. If you are using pattern paper, you may wish to back it with some cardstock to make the card a little more sturdy. I've cut another egg shape from yellow cardstock. Glue the paper and cardstock together.

Fceggcard2

2. Cut the egg in half. I've used a zig-zag line to {hopefully} resemble a cracked egg on my finished card. See my other sample below where I've just cut straight across the egg.

Fceggcard3

3. Embellish the egg. I've used felt ribbon which I've attached to the egg by sewing buttons onto the egg and have used brads through the felt flowers.

Fceggcard4

Make sure your cracked egg can still 're-join' when the card is closed. I actually removed the larger green flowers (third row from the top) and left the smaller ones, as my egg wasn't closing properly.

Fceggcard8

4. Stamp your greeting to the inside of the UL Secret Keeper Card. As the surface of the card is shiny, use StazOn ink. I've just received this gorgeous little Easter stamp set from Paper Salon, so was very keen to use it.

Fceggcard6

Add some colour with doodling. I've used Sharpie pens for this, again they are a permanent marker suitable for shiny surfaces.

Fceggcard7

5. Turn your egg over, matching the two sides. Position the closed Urban Lily Secret Keeper card and glue in place. Leave the glue to dry before opening and closing the card.

Fceggcard9

And it's finished. Here it is closed...

Fceggcarda_2

and opened.

Fceggcardaa Fceggcardaaa

This is another Easter egg card which I made. This was a bit simpler. I cut the egg in half and added flowers around the edge before gluing to the Urban Lily Secret Keeper card.

Fceggcardb

And this one open.

Fceggcardbb

Thanks for visiting. Hope you're having a great week.

Retirado daqui

01 março, 2010

Flores para a MÃE...

The last time my hubby gave me flowers on Valentine’s Day was four years ago. It was delievered by mail. Urmm… we live together so don’t know why he didn’t bring it in person, heehee. I was very surprised as I never received flowers by mail before.

It was tulips. His mother’s favorite flower, not mine. What was he thinking! Ugh! Heehee.

And I thought he was being cheap for not getting me the roses. He said the tulips costed as much. So I got mad that he spent too much money on the flowers that will wither. No wonder he doesn’t bring me flowers anymore. Hehe.

I was planning on making these flowers for a while, and finally was motivated to make it after seeing Sassafras’ challenge to create something for someone you love.

I love my kids the most, but if I didn’t love my husband first, they would not be here. So here it is… Fake flowers for the love of my life! =)

PAPERS: Sunshine Lollipops and Hog Heaven from Sassafras;
BRAD: Dainty Dots from Sassafras;
FLOWER POT TEMPLATE: Tapered Box by Kelleigh Ratzlaff Designs

Flowers were made almost the same way as the “snow flowers” I made last year. Except I used a smaller scallop circle punch. I was going to use a plain circle punch, but I was inspired by Sinead’s Uptown Citrus Flowers.
Little blue dot is where I made a hole to put the wire through.


Roll it tight starting from the outside.


Then squash it down. It’ll give the flower some distressed look.


Then, pull the center part up. Looks like a little cobra. =)


Make some stamen using beads and flower wires.


Insert the wire through the flower. Remember the blue dot?


Put a little dab of glue on the bottom/center of the flower.


Wrap it around the wire.

I used bamboo skewer and wrapped the wires around.

.