The Christmas Tree Softie tutorial,
There are many Softie Tree patterns out there, and here is mine. This is going to be a long post as there are lots of step by step photo's, so let's get started!.

To make one Softie Tree, you will need -
2 fabric rectangles 22 x 15 cm, these can either be in one fabric, or made up with a variety as I have done (see photo below)
a felt circle, 7.5 cm diameter (this will become the base)
a card circle, 7 cm diameter (card from a cereal box is fine)
2 squares of felt 5 x 5 cm (for the star)
selection of buttons, various sizes and colours
embroidery thread (I have used red Pearl Cotton 8)
sewing needle, scissors, pins, pencil, sewing machine is optional
stuffing & a smallish pebble (to weight the tree)
paper, a square 5 x 5 cm, and a rectangle 12.5 x 19 cm
chop stick (also optional)

First, fold the large paper rectangle in half lengthways, draw a diagonal line from one corner to another, and cut down the line. Open it out, and you will have your paper tree template. Place the fabric rectangles face together, and pin on the template. Cut out the tree shape, adding an additional 1 cm of fabric to the bottom (see photo below).
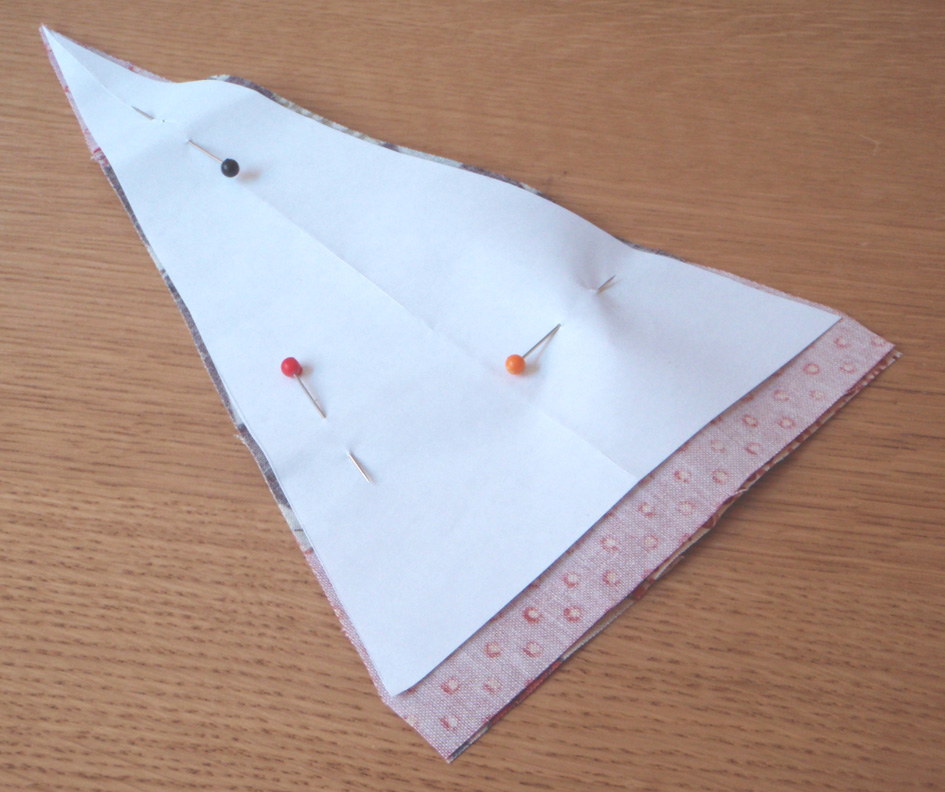
Remove the paper template (and keep so you can make more tree's later), pin the fabric together and sew down each side, 0.5 cm in from edge (you can do this on a sewing machine or by hand using backstitch), then turn your tree the right way round. You can use a chop stick to push out the point of the tree if it is a bit fiddly. Turn the additional 1 cm hem inwards to hide the fraying edge. I have added a 'Lucykate Crafts...' label, you won't need to do this, as you know the rules, tutorials are for personal use only, and not to be used commercially!

Stuff the tree, lastly, adding a pebble wrapped in the stuffing inside the base to give it weight so it doesn't topple over. Pop the card circle in the base and,

position the felt circle over the top, sew in place using straight stitches.

Now it's time to add some buttons as decoration,

you can add as many as you like.

Now, take the paper square, and draw on a star shape, cut out to make your star template. Use this to cut the first star from the felt, then use the felt star as the template to cut out the second, this way they both match.

Pin the 2 stars together, and begin to sew round the edge to join the two using blanket stitch. When you get to the last part of the star, place it over the tip of the tree.

Continue to sew the blanket stitch, one side of the star at a time, taking care to make sure you attaching the star to the tree with each stitch. Complete one side of the star, then turn the tree over, and stitch the same on the other.

Then you are done!, it would be very easy to alter the dimensions of the tutorial and make your tree larger or smaller if you wanted to.

Please feel free to join the Lucykate Crafts... pattern pieces Flickr group to show off your trees, and there is also a Flickr group totally dedicated to tree softies. If you are on the look out for more christmas tutorials, there is always my robin from last year, or the love letter could be adapted to make a christmas card, and should you feel inclined to wear a pair of leggings on your head, then make an Elf hat, it will look a little less silly!
There is also a whole month of christmassy projects appearing at UK Handmade, the first is here.
Happy Stitching!
7 comentários:
Oi amiga.
Lindas idéias,adorei os pinheirinhos,lindamente decorados.
Natal...
É o mês de confraternização Agradecimento pela vida
Bênçãos ao filho de DEUS
União, amor, reflexão!
O melhor presente
è a alegria do teu sorriso
O poder do teu amor
A sinceridade do teu carinho
Enfim a tua amizade.
Feliz Natal para voce.
bjtos.Nile.
Teu blog é muito lindo querida. Estou te seguindo como Marlenny Art Biscuit.
Abraços.
Quanta coisa linda por aqui...amei o seu blog e já estou te seguindo...rs!!!
Bjokas
Passei para deixar um beijinho e desejar um feliz natal.
¸.•´¸.•*´¨) ¸.•*¨) ¸.•´¸.•*´¨)
(¸.•´ (¸.•` * ¸.•´¸.•*´¨) ¸.•*¨)
........|___|...Desejo-lhe
........|000|...Um Feliz Natal
........|000|...Cheio de saude...amor
........|000|...e prosperidade
........|000|... Feliz ano Novo de 2010
.........\00/.... Que este ano seja carregado
..........\0/..... de bons projectos...
...........||...... Que todos os seus desejos e da sua familia se concretizem
...........||......Feliz Natal!!!!
...........||......Bom Ano Novo
.........._||_....Guida
♥¸.•*¨)¸.•*¨)
(¸.•´♥♥.¸.•´¸.•*´¨) ¸.•*¨) ¸.•´¸.•*´¨) ¸.•*¨)
Olá amiga
venho desejar que passe um Feliz e Santo Natal na companhia de todos os que lhe são queridos
bjs
Paula
i may well have missed it, but i can't remember being asked if it was ok for my whole tutorial to be re-posted here.
Obrigada querida!!!
Divulguei no Feltro-Aholic, http://feltroaholic.blogspot.com/2010/10/pinheirinhos-de-tecido-tutorial.html
Beijinhosss
Carine
Enviar um comentário