28 fevereiro, 2010

Arte na Parede

Arte na parede

Achei linda essa dica! Há coisas por aí que são tão caras, essa é uma simples e barata maneira de fazer um Wall Art. Mas há aqui neste caso um detalhe que fez toda a diferença, a composição com esse espelho. Eu vi aqui HomeMade Mamas. Vamos ao passo a passo: você vai precisar de rolos de papelão (de papel toalha, papel higiênico, o que tiver), tinta spray na cor desejada, cola e clips para segurar durante o processo da colagem.

Marque a medida em todos os rolos (cerca de 1,5cm +/-).

Corte todos com a mesma altura.

Vá de sua maneira formando o desenho, encaixando um do lado do outro, coloque cola e clips para ficar bem fixado. Uma dica que deixo apesar de não ter sido colocada é não fazê-los muito grande, é uma estrutura que não aguenta muito peso, faça pequenos grupos e depois na parede vá juntando e formando a sua arte.

Veja aqui eles ao serem pintados com tinta spray, veja que os pedaços são pequenos.

E aqui tudo foi juntado formando o trabalho.


Vi aqui

27 fevereiro, 2010

Árvore da Páscoa...

SUPER EASY TO MAKE EGG TREES
A NETTIE ORIGINAL!!!

1- Pot (from Dollar Store)
1- pkg. Body Scrunches or puffs (2 for $1.00 from Dollar Store)
clay
hot melt glue
Acrylic Paint - color of choice (matched to basket)
1-pkg. mini speckled egg ornaments (from Dollar Store)
one bag makes 3 trees, I used 12 per tree
Easter Grass
1- 3/8" Dowel cut to 8" (I used a square dowel made of basswood)
Ribbon cut to about 18-24"

Total Cost to create one tree is about $2.50

1. Paint dowel, encase it in a hunk of clay. Glue to bottom center of pot allow to dry.
2. While glue is drying. Prepare body scrunchie by hot melting the mini eggs in the netting, place them in the folds randomly to make them look like they are in "nest". Cut looped string from scrunchie being careful not to cut netting.
3. Cut Ribbon, tie it around dowel rod approximately 1/2" from top.
4.Where you removed loop from scruchie float some hot melt glue into the hole. Turn pot upside down and place dowel into area squeeze the outside of scunchie to conform until it dries.
5. Fluff, add grass to pot and decorate as desired. I purchased a pack of slightly larger eggs that matched the little ones to use for decorating. They were a soft plastic so I cut halfway through them and zigzag cut one or two and placed in bottom area of pot to look like they had hatched.

** They really came out looking nice my cam is not so nice *grin*
The purple one above was made without using a pot by molding some clay around the rod and allowing it to harden.
I have not tried but thought about molding the rod into the center of the pot and then filling the pot with green jellybeans.

Another variation came to me for my Easter tree. You could stick the pole into a hunk of styrofoam (a 1/2 ball) wrap a
coordinating washcloth around it place some decorative little soaps on top and it's an instant bath decoration as well.

This project is super quick , fun and produces eggs-cellent results!!

Vi aqui

Coelhinhos :)

Angelic Bunny Pin

(c) 1996 Doni S. Hardy

HOME NSTDP PATTERNS

Paints

Delta:

Gyspy Rose

Light Ivory

Deco:

Blue Mist

Avocado

Black

Light cinnamon

White

Jo Sonja:

Burgundy

Clear Glazing medium or Kleister Medium

Supplies

1 - 2 1/2" x 1 1/4" x 3/16" primitive heart

1 - 3/4" furniture button

2 - 1" wooden hearts

1" pin back

2"x2" 140 lb watercolor paper

Krylon Matte Finish

E-6000 Adhesive

Sand wood pieces and dust with tack cloth.

Transfer scallop pattern for dress onto large heart.

Transfer ears onto watercolor paper and cut out now or wait until the ears have been painted.

Base

Lt. Ivory: Feet & head.

Blue Mist: Dress.

White: 2 1" hearts (wings)..

Gypsy Rose: Three roses on dress

Gypsy Rose: Shade (float) on feet at dress edge on front, sides and back and then between feet. Shade inside of ears.

Burgundy: Shade center and bottom of roses. Add second value on feet where both feet meet dress.

Mix Gypsy Rose + White: place comma strokes on the left side of roses.

Burgundy: Comma strokes on the right side of roses.

Avocado: Leaves are sit downs around the roses.

Light Cinnamon: Dot eyes.

Black: Dip dot heart for nose.

Gypsy Rose: Stipple cheeks. Dip dots in sets of three on dress.

Lt. Ivory: Single dots on dress. Highlight in upper left or right of eye.

Black: Use liner for whiskers & mouth.

Comma strokes on wings are done by dressing brush with clear glazing medium or kleister medium and then picking up Blue Mist. This will give you a more transparent stroke.

Finishing Sand areas that will be glued together to help adhesion. Glue wings together & let dry. Roll ears around large brush handle to give them shape. Glue ears to back of head & let dry. Glue head to body & body to wings & let dry. Glue pin back to the back of wings, it may help to prop bunny up on the top of a paint bottle so it will dry flat. Spray two coats of Krylon Matte on all sides and you're done. Enjoy!

Vi aqui

17 fevereiro, 2010

Estojo de Manicure


Estojo de manicure


Estojo de manicure

Você vai precisar de:

Estojo de manicure
  • 1 retalho de aprox. 20 cm x 30 cm para a frente e o bolso
  • 1 retalho de aprox. 20 cm x 20 cm para o forro
  • 1 retalho de entretela de aprox. 20 cm x 30 cm
  • Máquina de costura, linha, agulhas, tesoura...
Tempo

30 minutos

Baixe o molde, imprima e vamos lá...

[Mais:]

O primeiro passo é cortar de acordo com o molde. Lá você encontra as instruções, mas vou repetir aqui: São 3 peças da maior (1 da frente, 1 do forro e 1 da entretela) e 2 da menor (1 da frente e 1 da entretela).

Estojo de manicure

Depois, pregar a entretela.

Estojo de manicure

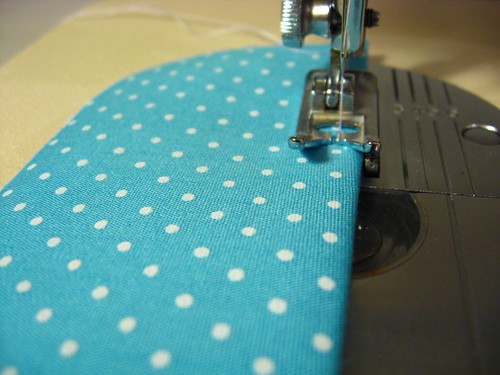
No bolso, faça uma dobrinha pra dentro e marque com o ferro. Meio centímetro já basta.

Estojo de manicure

Nessa dobrinha, faça um pesponto na máquina...

Estojo de manicure

Vai ficar assim:

Estojo de manicure

Agora posicione o bolso na peça do forro e prenda com um alfinete, como na foto.
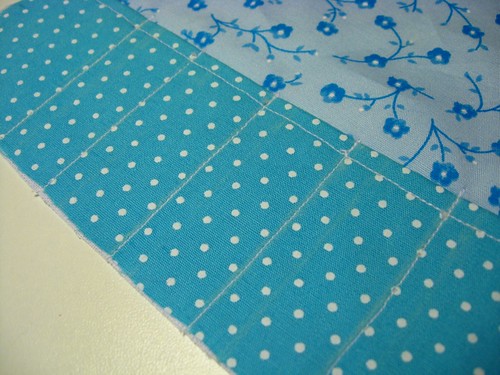
Essa é a hora de marcar as divisões do bolso com um giz ou uma caneta de tinta lavável.

Estojo de manicure

Passe a costura...

Estojo de manicure

... e pronto:

Estojo de manicure

Próximo passo: Juntar as duas peças, frente com frente, e prender com o alfinete.

Estojo de manicure

Passe a costura na volta toda, mas deixe um espaço aberto para virar a peça para o direito.

Estojo de manicure

Eu preferi deixar em um dos lados menores, mas pode ser em qualquer lado.

Estojo de manicure

Dê uns 'piques' com a tesoura nas sobras das partes arredondadas. Isso vai ajudar a deixar o acabamento mais liso.

Estojo de manicure

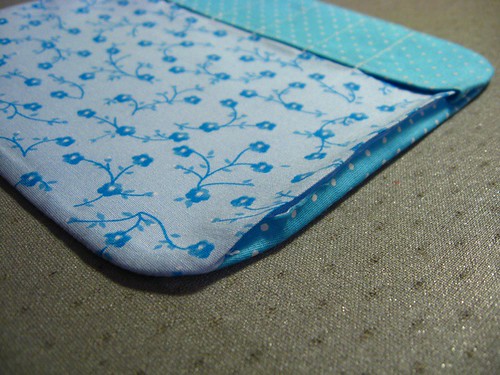
Vire para o direito.

Estojo de manicure

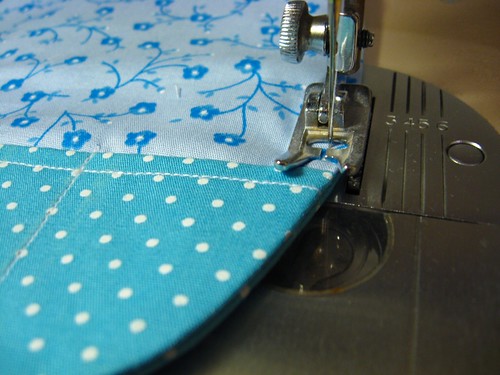
Passe o ferro em toda a volta. Aproveite para marcar a parte que ficou aberta...

Estojo de manicure

... porque ela vai ser fechada no pesponto.

Estojo de manicure

Prontinho! Só colocar os apetrechos dentro...

Estojo de manicure

e fechar!

Estojo de manicure

Vi AQUI

15 fevereiro, 2010

Ainda pensando no S.Valentim...

Fold a heart page marker

This is simply too easy not to make!


1. Use a square piece of paper.
2. Fold in half. Crease.


3. Half again. Crease.
4. Open up.


5. Fold bottom portion to the middle crease line.
6. Turn over. From the edge on the left, fold a triangle.


7. Repeat 6 on the right.
8. Turn over.


9. Bring point C to the top.
10. Turn over.


11. Use finger to make an opening.
12. Flatten to form triangle.


13. Repeat step 12 on the left side.
14. Fold a triangle from the edge for both sides.


15. Fold a tiny triangle from each peak.
16. Turn over. Fold the areas behind the dotted lines.

This origami model is simple but versatile because it’s also able to become a 4-leaf clover or a flower by grouping 4 together, hide a small item (like a ring) in front and even stand on its own by making an easel with the back flap.

Chapter: DIY + Tutorials